
AWS Route 53: Easy Vanity (Whitelabel) Nameservers
By Aaron F. March 19th, 2016
Introduction
Vanity nameservers are used when you want to hide your nameservers in WHOIS search results. This is beneficial in the event you want to hide where your web space & DNS services are hosted, or to just present a more professional appearance.
When hosting your DNS services with Amazon Web Services Route 53, they will assign each hosted zone (DNS record set) four nameservers. These nameservers will look like the following:
- ns-123.awsdns-12.com
- ns-456.awsdns-34.net
- ns-7890.awsdns-56.org
- ns-1234.awsdns-78.co.uk
As you can see, these nameservers are AWS branded, and not all that professional looking.
In this blog post, I will show you how to change the above to look like:
- ns1.example.com
- ns2.example.com
- ns3.example.com
- ns4.example.com
It is important to note, however, that this tutorial is not the same as creating reusable nameservers (delegation sets) which can be reused on multiple hosted zones (DNS record sets) and domain names. Stay tuned for another article on how to do that!
Create Your Hosted Zone
First thing you are going to do, is login to your AWS console. From there, you will navigate through the services menu to Route 53, then select "Hosted Zones" from the vertical menu at left.
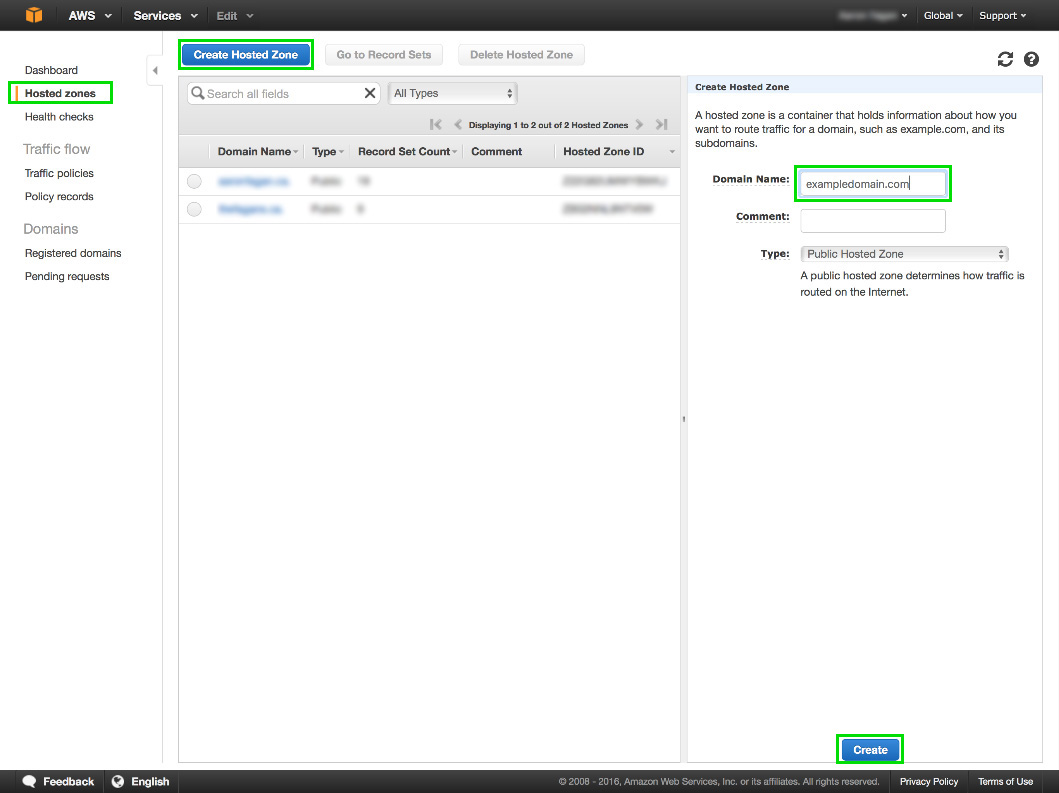
Next, we will need to create your hosted zone. Click the blue "Create Hosted Zone" button at the top. This will pop out a right side options pane where you will enter in your domain name.
Enter your domain name & comment (if so desired). Leave the type as "Public Hosted Zone," and click the "Create" button at the bottom.
Get Your Nameservers
Once you have clicked the create button, AWS will bring you into your hosted zone file. We need to back out of here. Click the "Back to Hosted Zones" button in the top left.
To get our assigned nameservers, we need to highlight the domain we just created. This will pop out the right side options pane again, where it will list the assigned nameservers.
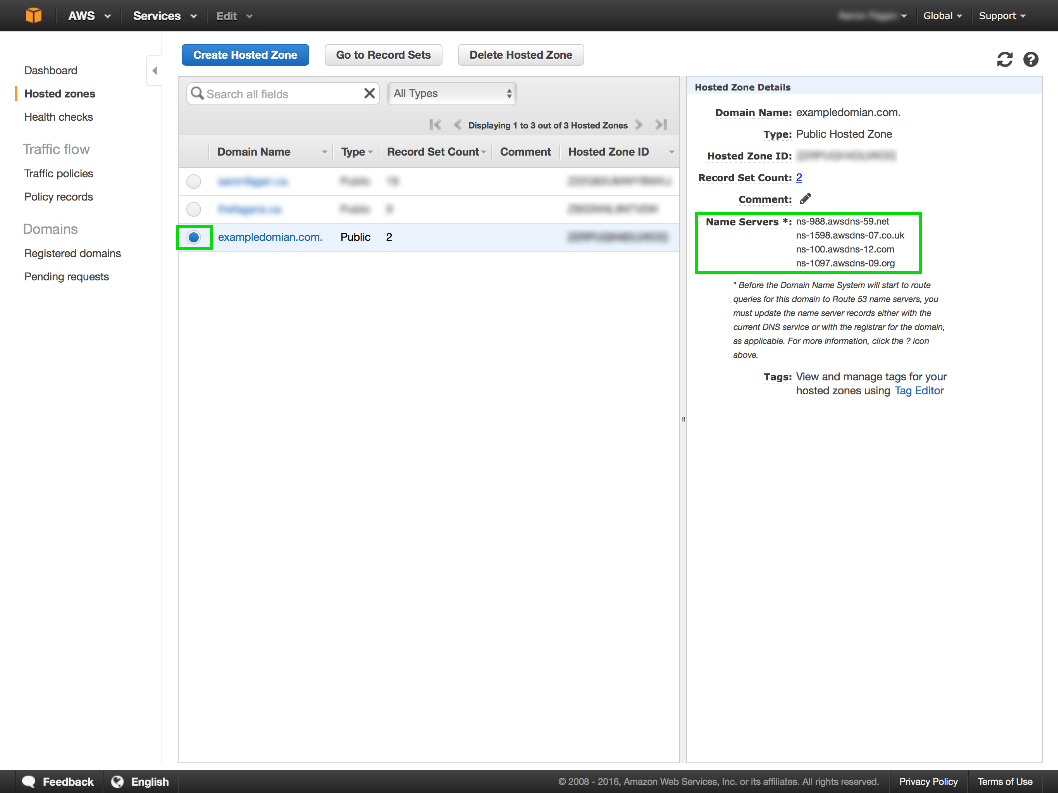
Note these nameservers down.
Now, you will need to get the IP addresses associated to these nameservers. I like to use whatsmydns.net. Search for each of the listed nameservers A record. This will give you the IP addresses we need.
Create Your Vanity Nameservers
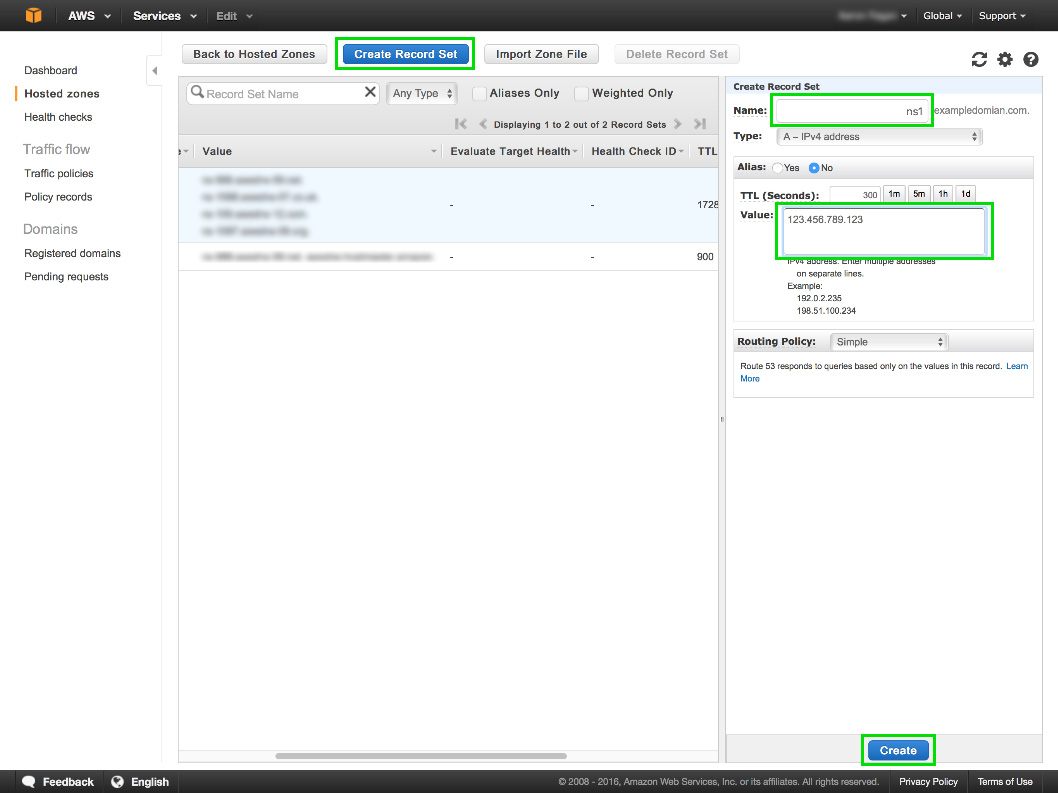
Now that we have the IP addresses to our assigned nameservers, we must create our own A records that point to those IP addresses.
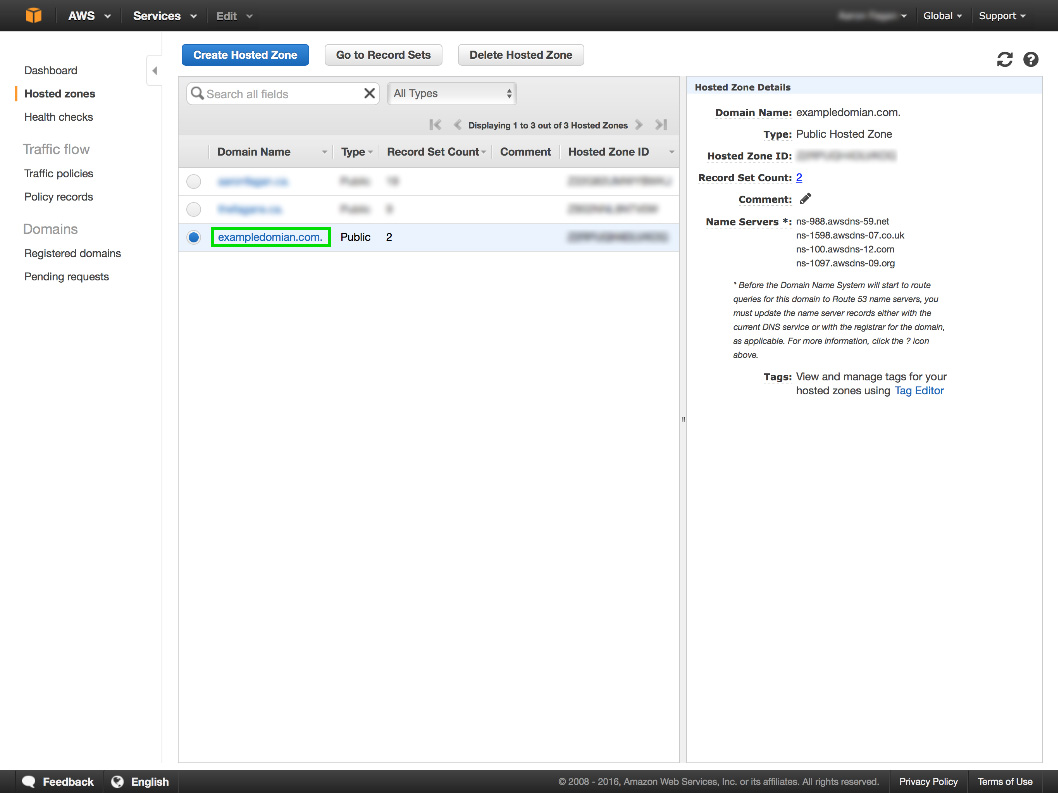
In the Route 53 hosted zones console, click on the domain name that we have been working with, which will bring us into the hosted zone.
From here, create an A record, such as ns1.exampledomain.com, and point it to the first IP address. Repeat this step for the additional 3 nameservers we need to create, being sure to customize each as needed (ns1, ns2, etc). Set your TTL to something a little more reasonable than the 300 second default.
Wait for a little while for these A record to fully propagate. You can check the propagation by searching the A records we just created, at whatsmydns.net.
Finally, update the nameservers attached to your domain name, and you are done!
Conclusion
Additional steps may be taken if desired. You may want to update your NS record with your vanity nameservers, as well as the single nameserver listed at the beginning of your SOA record. This is entirely optional, but is one step in the right direction to taking advantage of your newly created vanity nameservers!
Thanks for reading!
Topics: Amazon Web Services, Cloud Infrastructure